

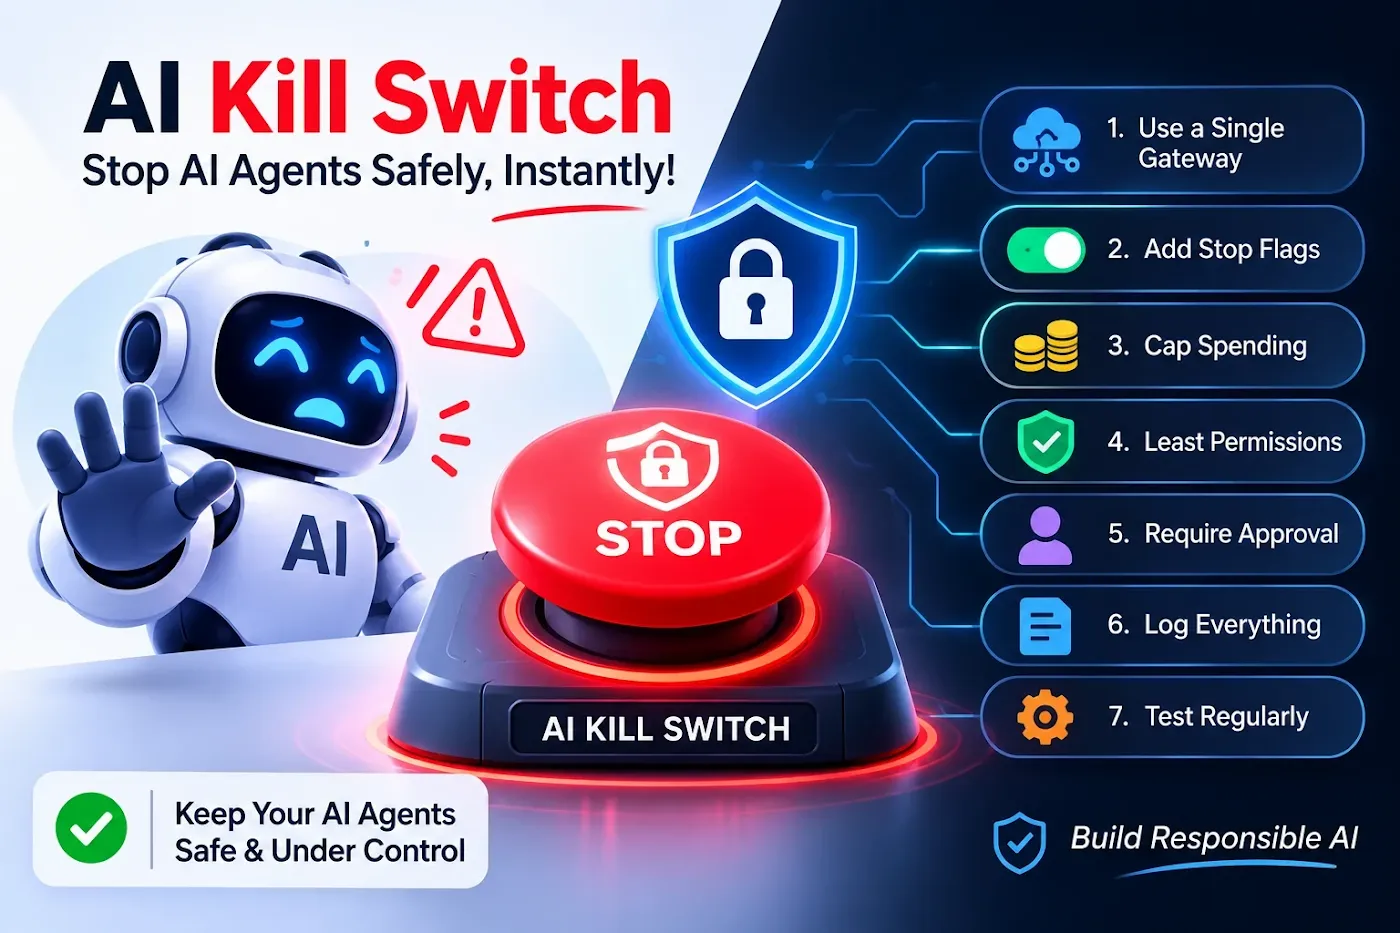
This week CrowdStrike launched an AI Kill Switch, a tool that lets a human shut down an AI agent that has gone off script. You may not run a security platform, but if you build chatbots, n8n automations or AI agents, you face the same risk on a smaller scale: what do you do when an agent starts doing the wrong thing, and how fast can you stop it? This guide explains what CrowdStrike announced and shows you how to build a kill switch for your own projects.
Quick Summary
The news: on November 3, 2026, CrowdStrike announced an AI Kill Switch inside its Falcon Guardian platform, available at launch.
What it does: a human administrator can cut an agent off, block it from restarting and limit its network access. It starts at the AI gateway, with endpoint-level termination planned next.
Why you should care: any agent that can call tools, spend money or message customers needs a way to be stopped quickly.
The method: route every model call through one gateway, add a stop flag, cap spending and steps, limit permissions and rehearse the shutdown.
What you get below: a 7-layer checklist, a code example you can copy and an n8n pattern.
What did CrowdStrike actually launch?
CrowdStrike introduced the AI Kill Switch at its Fal.Con Europe event in Barcelona. It is part of Falcon Guardian, a product that finds AI agents inside a company, watches their behaviour and enforces rules. The company describes the kill switch as a way for a human to have the final say when an agent behaves unexpectedly, is compromised or is manipulated by malicious instructions.
The first version works at the AI gateway, which is the checkpoint between an agent and the models and services it uses. Cutting an agent off there means it can no longer reach its model, so it cannot think or act. CrowdStrike has said that stopping the agent directly on the devices where it runs is planned for later. The launch came with two planned acquisitions of AI security startups, which shows how seriously the industry is taking agent safety.
Why every AI builder needs a kill switch
Agents are different from normal software because they decide what to do next. That makes several things possible:
- Runaway loops: an agent that retries forever and burns through your budget.
- Wrong actions: an agent that sends a message, deletes a record or changes a setting it should not touch.
- Manipulation: a malicious instruction hidden in a document, email or web page that tricks the agent, often called prompt injection.
- Bad updates: a prompt or model change that suddenly makes behaviour worse.
When one of these happens, the first question is not "why". It is "how fast can I stop it?" A kill switch gives you the answer before you need it.
Stopping the brain versus stopping the hands
There are two different ways to stop an agent, and it helps to know both.
Stopping the brain means denying the agent access to its model. The process may still be running, but it can no longer decide anything. This is fast and easy to build, and it is exactly where CrowdStrike started.
Stopping the hands means removing the agent's ability to act: revoking its tool permissions, API keys and network access, and terminating its processes. This is slower to build but more complete.
A good setup has both. Start with the brain because it takes minutes, then add the hands.
The 7 layers of a kill switch for your own agents
1. Send every model call through one gateway
Do not let each workflow call the model directly. Create one small function or service that every agent uses. This single choke point is where you can add a stop flag, a spending cap, logging and rate limits. It is the same idea CrowdStrike used, just at your scale.
2. Add a global and a per-agent stop flag
Keep two switches somewhere fast to read, such as Redis, a database row or a feature flag service. One stops everything, and one stops a single agent. The gateway checks them before every call.
3. Cap spending, steps and retries
Many failures are simply loops. Set a maximum number of steps per task, a maximum number of retries and a daily spending limit per agent. A cap is a kill switch that fires on its own. The token budget guide shows how to set sensible limits.
4. Give agents the least permission they need
If an agent only needs to read orders, do not give it the ability to refund them. Use separate API keys for each agent, with read-only access wherever possible, so that revoking one key stops one agent and nothing else.
5. Require approval for risky actions
Sending money, deleting data, emailing customers and changing production settings should wait for a person to approve. A human approval step means a confused agent can propose a bad action but cannot complete it.
6. Log every decision
Record what the agent saw, which tool it called and with what input and output. When something goes wrong, the log tells you what happened and whether your stop worked.
7. Practice the shutdown
A kill switch you have never tested is a hope, not a control. Once a month, trigger it on purpose, confirm the agent stops within seconds and confirm you can turn it back on safely.
A kill switch you can copy
This Python example shows a gateway function that checks a global flag, a per-agent flag and a step limit before every model call. It uses Redis for the flags, but any fast store works.
import redis

r = redis.Redis(host="localhost", port=6379, decode_responses=True)

MAX_STEPS_PER_TASK = 20

class AgentStopped(Exception):
    pass

def call_model(agent_id: str, task_id: str, prompt: str):
    # 1. Global and per-agent stop flags
    if r.get("kill:all") == "1" or r.get(f"kill:{agent_id}") == "1":
        raise AgentStopped(f"{agent_id} is stopped by kill switch")

    # 2. Step limit for this task
    steps = r.incr(f"steps:{task_id}")
    r.expire(f"steps:{task_id}", 3600)
    if steps > MAX_STEPS_PER_TASK:
        raise AgentStopped(f"{task_id} exceeded {MAX_STEPS_PER_TASK} steps")

    # 3. Real model call goes here (log input and output)
    return send_to_model(prompt)
To stop one agent, set kill:support-bot to 1. To stop everything, set kill:all to 1. Remove the key to turn the agent back on.
The same idea in n8n
If you build with n8n, you can use the same pattern without writing much code:
- Make the first node of every workflow read a stop flag from your database, Redis or a simple endpoint you control.
- Add an IF node that checks the flag.
- If the flag is on, send the workflow to a Stop and Error node. Otherwise, continue as normal.
- Add a loop counter and stop the workflow when it passes your limit.
This takes a few minutes per workflow and gives you a single place to pause all your automations.
Common kill switch mistakes
- Building the switch after the first incident instead of before.
- Letting agents call the model directly, so there is nowhere central to stop them.
- Using one shared API key for every agent, so you cannot stop one without stopping all.
- Never testing the switch.
- Stopping the model but leaving the agent's tool permissions open.
- Having no log, so you cannot tell what the agent did before you stopped it.
- Forgetting to plan how to turn things back on safely.
Kill switch checklist
- All model calls pass through one gateway
- A global stop flag and a per-agent stop flag exist
- Spending, step and retry limits are set
- Each agent has its own key with the least permission it needs
- Risky actions wait for human approval
- Every decision and tool call is logged
- The shutdown is tested at least once a month
- There is a written way to restart safely
Frequently asked questions
What is an AI kill switch?
An AI kill switch is a control that lets a human immediately stop an AI agent, block it from restarting and limit what it can reach. It is the emergency brake for autonomous software.
What did CrowdStrike announce?
On November 3, 2026, CrowdStrike announced the AI Kill Switch in its Falcon Guardian platform. It starts at the AI gateway and lets security teams stop agents that behave unexpectedly, with endpoint-level termination planned.
Do small projects need a kill switch?
Yes. Even a simple chatbot or automation can loop, overspend or send the wrong message. A flag in your gateway and a few spending limits take minutes to add and can prevent a costly mistake.
What is the difference between a kill switch and a guardrail?
A guardrail tries to keep an agent within safe behaviour. A kill switch is the last resort that stops the agent when guardrails fail. You need both.
Final thoughts
AI agents are becoming more capable and more independent every month, and the companies building safety tools are racing to keep up. You do not need an enterprise product to be safe. One gateway, one flag, a few limits and a regular drill will protect most small and medium projects. Build the off switch first, and you can let your agents run with confidence.
Read next
- Human-in-the-Loop AI: How to Add Approval Steps to Your Agents
- Apple Just Cut Its Engineers' AI Budget: How to Set a Token Budget for Your Own AI Projects
- Production RAG Pipeline: The Architecture, Chunking and Evaluation Guide
Want help adding safety controls to your AI agents or automations? Get in touch.
Claude Code Secrets Leak: How "Don't Ask Again" Exposes Your API Keys and How to Fix It
Approving a command with don't ask again can save your API key in .claude/settings.local.json. Here is what researchers found and a 15 minute check to protect your repos.